by David Dorado
As waterproofing specialists, we routinely come to the rescue of homeowners who have brand new waterproof deck systems that are leaking due to improper installation. Without getting trained and certified by the manufacturers, many general contractors and handymen think they can just ‘wing it’, however, waterproofing systems involve many layers that must be installed correctly.
What is a Weep Screed and why is it important?
One of the most crucial (and often overlooked) components of a successful waterproofing system installation is the weep screed detail around the perimeter interface of all walls. The purpose of a weep screed is to provide relief for the exit of rain water which may possibly intrude into the stucco wall from many areas, such as; the roof, vent pipes, windows, doors and hand rails. It is manufactured with holes punched into the protruding lip, below the vertical attachment flange, to achieve good venting at the base of the wall. This allows the water to travel from the roof down to the base of the plaster wall and onto a waterproof system which should properly drain off the deck, at a ¼” per foot as previously noted in our March 2016 blog. The weep screed is overlapped onto the L metal around the perimeter to protect the system from water intrusion where the vertical and horizontal surface meet.
Deck to Wall Metal
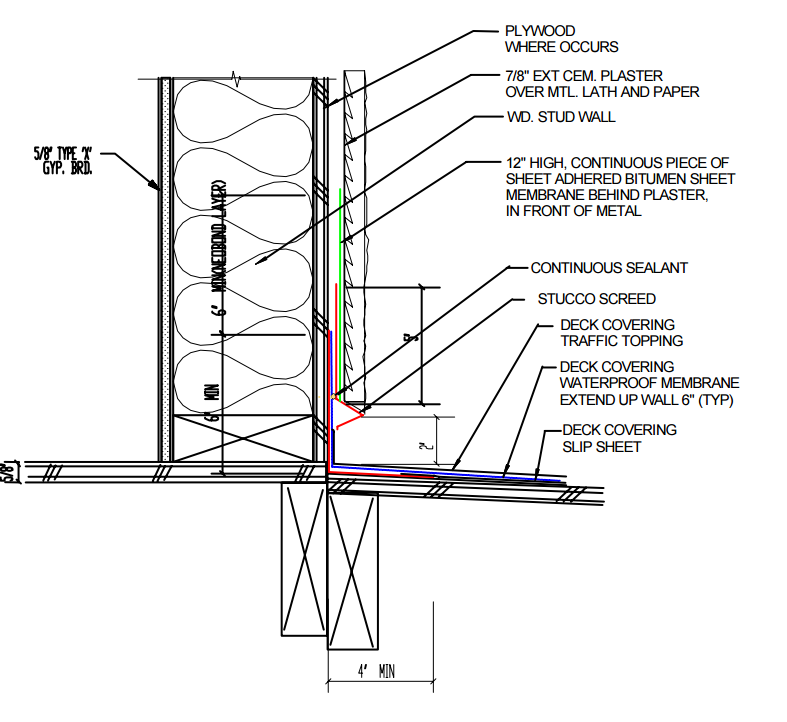
Before installing the weep screed, “L” metal needs to be fastened around the perimeter of the deck to wall transition. Without the “L” metal, a weep screed cannot function properly. It is just as important as the weep screed. The waterproof membrane is wrapped up a minimum of 6″ over the “L” metal so that the weep screed can counter flash the metal and prevent any water from entering behind the weep screed.
Case Study: Anaheim Hills residence
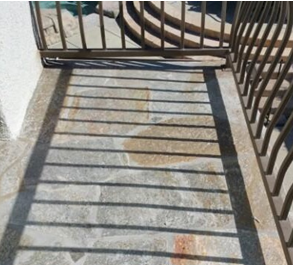
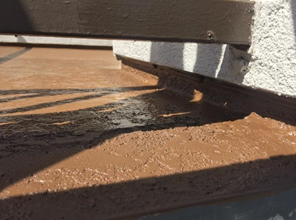
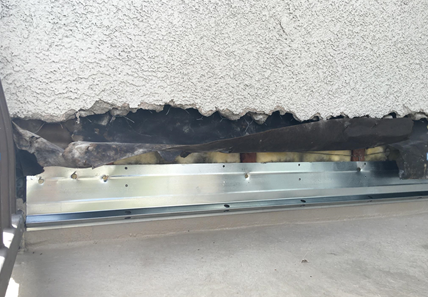
WICR was called out to a client’s house in Anaheim Hills to inspect leaks coming into their living room from the ceiling above. Based on the location of the leak, our suspicion was that it was coming from the deck upstairs, even though the deck looked perfect to the naked eye. Two waterproof specialist had already been called to the home to perform water tests and both were unable to determine the source. During our inspection the first thing we noticed was the deck to wall transition was missing a weep screed and the stucco was terminated at the surface of the deck. This was a huge red flag. The lack of a weep screed led us to believe that we may find more construction defects hidden within the deck. No “L” metal around the perimeter could be identified and was confirmed to have not been installed upon removal of the stucco and the stone.
Preparation process:
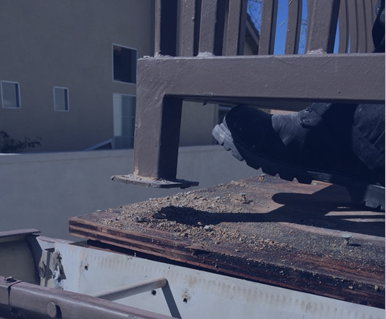
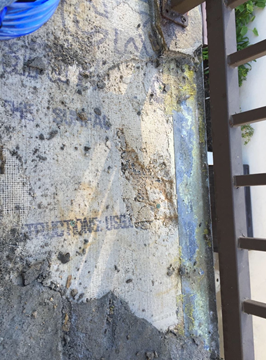
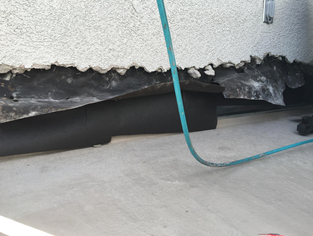
In order to address these issues WICR recommended demo of existing stone tile surface and stucco perimeter, followed by the installation of “L” metal around the perimeter and installation of Dexcellent II system. Upon completion of the stone and stucco perimeter demolition, our field team identified damage underneath the surface, which was concealed within the deck. The plywood sheet was saturated with water; the stucco paper was badly deteriorated as well as the plywood backing. Had these existing conditions gone untreated it appears that dry-rot may have begun to jeopardizing the structural integrity. The existing waterproof system underneath the stone tile was starting to decay. Stone tile was not installed with a waterproofing system designed for below tile and stone use.
Installation process:
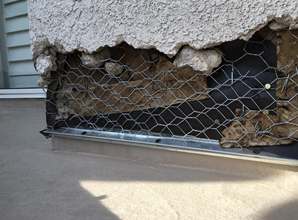
I went out to the job site and observed team lead Gary Campbell as he was preparing the deck and wall to install a new weep screed around the perimeter. Before starting the weep screed Gary installed 24ga. GSM 4”X6” “L” metal for a deck to wall transition. The first step was to install new stucco paper and tie it into the existing one. This acts as the reinforcement barrier which protects the structure from moisture intrusion.
The next step is to fasten the weep screed all along the perimeter of the stucco wall, making sure that the stucco paper overlaps a minimum of 2” onto the weep screed. This prohibits any water from entering into the stucco wall from the at the stucco termination.
The next step is to fasten metal lath over the stucco paper and tie it into existing lath. This acts as the structural reinforcement to maintain the strength of the stucco base.
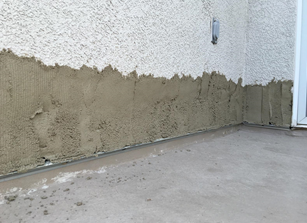
The final step is to mix the base coat and apply to the metal lath around the perimeter, filling in the demo area, overlapping over the weep screed.
After the stucco and surface texture has been applied it needs at least 24 hours to dry out. Once it is dry it is ready for the final UV resistant top coat.
In conclusion:
Whenever installing a new waterproof system, ensuring a water-tight transition and interface into the perimeters should always be a TOP priority. There have been so many cases of leaking and failing decks which have been attributed to improper metal flashing or missing crucial waterproof components such as the weep screed and L metal. Most of these cases could easily have been avoided by following UBC standards and installing recommended metal flashing. In theory these issues should never occur with proper design planning and execution.
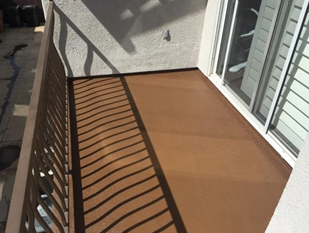
Here is the finished product: